
Summer Starts Here - Save up to 70%
To see if this custom-fit item will work for you please tell us what vehicle you'll use it with.
Thank you! Your comment has been submitted successfully. You should be able to view your question/comment here within a few days.
Error submitting comment. Please try again momentarily.


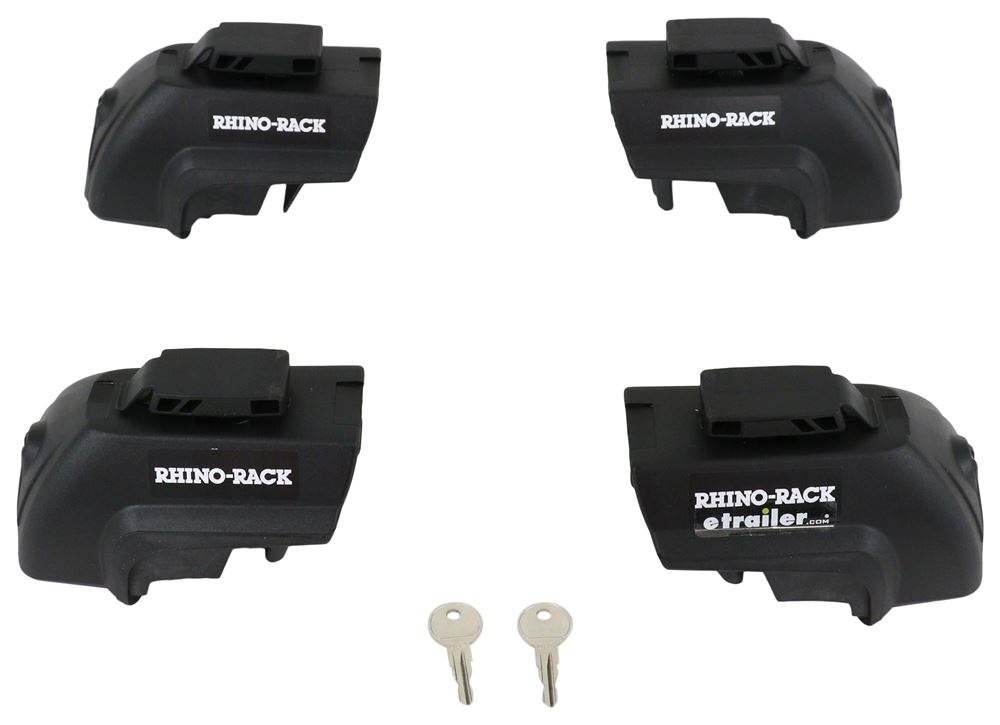


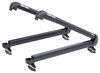
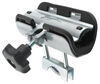
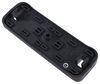
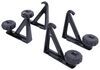
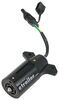
Durable nylon legs with built-in locks let you mount Vortex Aero crossbars to your vehicle's factory flush side rails. Integrated handles tighten legs to rails for easy installation. Pair with 2 crossbars to create a complete roof rack.
Features:
Specs:

Videos are provided as a guide only. Refer to manufacturer installation instructions and specs for complete information.
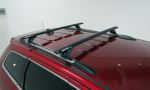
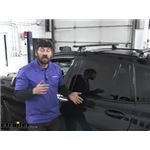
Hey everybody, today we're going to be going over and showing you how to install the Rhino-Rack Vortex Aero Crossbar system here on our 2021 BMW X3.So this is what our roof rack is going to look like installed. As you can see here we have this nice Aero Crossbar shape. This does a couple different things. Number one, it's going to cutdown on wind noise, so we're not going to have to worry about that noisy crossbar system on our roof here and hearing it inside the cab. And number two, it's also going to be more wind resistant, which again plays into wind noise but it also helps retain our fuel economy here. We're not going to have those bulky square crossbars that can actually decrease your miles per gallon.So the roof rack is going to be an excellent option for our X3.
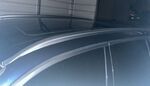
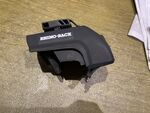
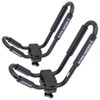
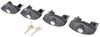
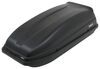
It's really going to make our vehicle much more versatile. We're going to be able to attach plenty of different rooftop-mounted accessories, such as a cargo box, a bike rack, a surfboard carrier, a ski carrier, or even a kayak rack. The possibilities really are endless.So right now we have the black crossbars installed on our vehicle, they're really going to blend in well with our dark blue paint here. There is, however, also an option for a silver crossbar. So it's really just going to come down to preference and which option you feel best matches your vehicle.So here we have the mounting feet, which is what pretty much holds our crossbars to our flush rails.
So all X3s are going to come equipped with these flush rails and they really make it very easy to install our roof rack here. There's only going to be two components to our kit, we just need the crossbars and then the mounting feet. We're going to have a little groove here, inside the channel of our flush rails, one on either side. And there's going to be sort of two teeth, if you'll call them, which are going to be some rubber-coated hooks which really grab into those lips there and hold it in place. As you can see it's very sturdy.The Rhino-Rack roof rack is really one of my favorite options on the market.
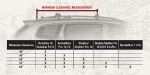
They don't quite have the big brand name appeal as Thule and Yakima but they really offer some great features in an affordable price. Something they do that Thule and Yakima doesn't do is they actually include the lock cores for you, which is just an extra measure of security.So in regards to weight this particular system here is going to be rated for 176 pounds. However, you do want to take a look in your vehicle's owner's manual to ensure that the capacity of the roof rails either meets or exceeds this. If it does not you'll have to go by the lower of the two ratings.A couple measurements here for you. Number one the length of our crossbars, it's going to be 54", so that's going to give us plenty of room to fit multiple items on the roof.
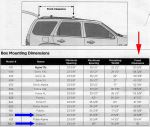
Something also I like to give is the distance from the top of the roof here to the bottom of the crossbar. Granted the roof does curve but at the highest point it's likely going to be about 2-3/4", which is going to be plenty of space.So now a common question we get is whether they can open their glass roof with the crossbars installed. And as you're about to see now that's not going to be an issue here for our X3, we'll have plenty of room.So now that we've gone over some of the benefits and features of our system here let's go ahead and jump right into that installation, so we can show you how it's done.So the first step of our installation we want to get a crossbar ready, along with two of our mounting feet. Now your crossbars may or may not come pre-installed with the end caps. If they are pre-installed we need to remove them. We're going to have a key in our kit that looks like this, we'll insert that into the end of the crossbar until we can turn the dial there to the unlocked position. Once we've turned it to the unlocked position we can go ahead and remove the end cap. We'll need to do this on both sides.Also, we're going to have to remove the protective channel lining here, if it comes installed. We'll just simply peel them out here, these little channels here line up with the grooves on the back. So we'll remove those from both sides as well, if they do come installed.So now we're going to take one of the feet here that comes in our kit, we're going to slide this into the channel on the bottom of our crossbar. The smooth side here, with our locking knob, is going to be facing outward away from the vehicle. So you'll see a little channel here that'll line up with the channel in our crossbar. We'll slide that onto position. We'll do that on both sides.So now with both of our feet on we'll take our end caps here. You should be able to see this little smooth surface here, with the locking symbols, those need to be facing up. And we'll just go ahead and press those on and then we'll lock them in place here, with our key. We'll do that on both sides.So we've already got one of our crossbar assemblies installed on our vehicle here. We actually have it installed over the B pillar. We're now going to go ahead and set the other crossbar assembly, that we just put together, over here on the back of the vehicle on the C pillar. Keep in mind we do have a recommended spacing between the center of the front bar and the center of the rear bar that Rhino-Rack recommends. This is going to be located in your instructions.We'll come up here and position the rail. We'll need to adjust the width of our feet here to line up with the flush rail atop of our vehicle. So next we're actually going to take the keys that come in our kit here, for our mounting feet, we're going to need to unlock those. Because once we do that we should be able to flip out our handle here. And right now the feet are a little bit too close together. Or the clamps, rather, on the feet are too close together to be able to fit on top of this flush rail, so we actually need to rotate this. Loosen it to the left to open that up, so then we should be able to sit it into position on our flush rail. Like that.Now what we're going to do is we're going to go ahead and adjust, evenly, the spacing or the overhang rather. Rhino-Rack recommends measuring from the front of the mounting feet here on the bar to the very edge of the bar here. So we just want to make sure that distance is even between the two sides.But once we get the correct distance we're going to go ahead and start to turn our little lever here to the right to tighten everything up. While we're doing this, however, we need to pay careful attention to the clips here and how they sit on our flush rails. There's actually going to be a rubber-coated metal clip here that's going to need to line up with the groove here in our flush rails. So while we're tightening down we need to make sure that that metal clip goes in this little groove here on our flush rail. If we don't do this we could risk actually deforming and damaging our flush side rails. But once we ensure that we're actually in that channel we can go ahead and tighten both sides down. Once we have it nice and snug we'll go ahead and re-lock our mounting foot. And that's going to stop the handle from being opened, and being loose, and to take off.Finally, if you remember the strips that we took out of the channels on the crossbar earlier we're actually going to need to cut these to a certain length, which is going to be relative to the space we have inside of our channel here. It's going to be inside the mounting foot, we're going to have a little space here to here. We need to measure that. And then we'll cut our strip to that length and install it into the channel. They just simply snap into place.And that'll do it today for our look and installation of the Rhino-Rack Vortex Aero Crossbar system here on our 2021 BMW X3..
Average Customer Rating: 4.6 out of 5 stars (157 Customer Reviews)
Durable nylon legs with built-in locks let you mount Vortex Aero crossbars to your vehicle's factory flush side rails. Integrated handles tighten legs to rails for easy installation. Pair with 2 crossbars to create a complete roof rack.This is the product that was recommended on etrailer as a fit for my BMW X-5, but when doing a search on the SKU I ordered, there’s a message that the product is not a fit. But actually it seemed to fit fine. I think it looks great. I’m concerned it moves a bit on the rail although I have it as tight as I can get it. Hopefully it will be fine. Furthermore, the directions that come with the product really suck. Not that it’s hard to attach, I used the video on the website to get an overview. I was disappointed that the top rubber insert was inside the bar and that information was not made obvious. I learned that by watching another video on YouTube after I ordered them from Rhino. Nonetheless, I’m happy with the purchase. It looks great on my X5 and was more reasonably priced versus the Thule.

Attaching the bars to these feet was simple, but I did need to read the instructions carefully. Once the bars were attached, mounting everything to the car was quick and easy. I love the built-in, locking handles that tighten the feet down. My previous rack required a separate tool to tighten the feet to the roof rails; this system is much easier to use. I’ve been using the roof rack for about a year now and it has held up very well.
Pretty easy to install, looks great(at least I think it does). A lot of videos available to watch, probably the best suggestion is to watch them until you’re comfortable with the install process.
Very satisfied with the product and it looks good as does the hitch from entailed (for bike rack) on my Kia niro
This rack was recommended as an alternative to a more expensive brand. I have used this twice with a luggage pod for 500+ mile destinations. I am very happy to report that I am more than happy with the quality/durability of the product, and the ease of installation/use. Also, it is very quiet. Highly recommend this product. I purchased the locking endcaps as well.
So far it was easy to install. The rubber tracks on top of the rack did not cover the entire length of the rack. There were two short pieces. One rack the lengths were inconsistent so not sure what that was all about. Otherwise pretty easy to put together and assemble.
They have held up to a 51lb eMTB and a fully loaded cargo carrier at speeds I shouldn't be driving at.
These things are great! I have them on my Land Rover Discovery Sport. They hang on and don't slip around, and they're quiet! I've had roof racks, furniture, lumber, and ladders all piled up there with no worries of slipping. I'd buy another Rhino Rack product in a heartbeat. I'm using these with the black Vortex Aero crossbars. They look good and are super functional. I'm looking forward to years of [ab]use!

Doug H.

2/13/2020
Another year on and these legs are holding on strong. Locks are not rusting and all mechanisms move freely. My Discovery Sport is uncovered in the elements 99 of the time and these things are holding up beautifully. And theyre quiet to boot! I recommend them whole-heartedly.
Good overall. But beware, I thought I had lost one of the rubber clamp covers and tried to get a replacement. The company (Rhino-Rack) does not stock replacement parts in the US. After many calls, they admitted that this is due to their being an Australian company and they don’t have the space in their warehouse for spare parts (direct quote from phone rep)!! Luckily I found the missing part later, but I would have been out of luck if not.
I've owned and used the roof rack for more than 1 year now. The rack installed as expected and has performed well over the last year. Mostly carrying a Thule car-top carrier filled with heavy car-camping equipment. Installed onto 2019 Kia Niro EV.

Mike
7/11/2022
Numerous road trips and no failures from this rack. Typically carry a Tule XL carrier fully loaded. The rack is always on the car.
These were great. Easy to install, clamped down nice and tight, held my rack and single scull perfect. All was good until someone was able to pry one off! They left a nice screwdriver dent on my car. Why have keys when all you need is a screwdriver. So now I have one complete crossbar with legs for sale.
After substantial research on the major brands out there, I chose Rhino for the weight rating & lower profile than many other roof racks. Six months later I have carried everything imaginable very securely including lumber & ladders. I am very happy with the performance & durability. They were fairly easy to installing as well. Would recommend & buy again.
We have had this rack for a year now. At first we had a faulty part that etrailer replaced no problem. We have had them on my Kia Niro this whole time and use it to hold my Yakima car top carrier when needed. We are about to do a cross country trip and I feel confident in the racks. And we got a much better deal than getting them elsewhere.
etrailer is the best. I have purchased from them several times with great results. My questions were answered promptly and I was guided to the right products.
Our previous RhinoRack has served us well for years. The rack for our new vehicle is secure, easy to install and we look forward to many years or service.
Very flimsy plastic parts. I won’t attach heavy or valuable gear to these racks in fear that the product will fail.

Mike L.
6/29/2019
If assembled and installed according to the instructions, the Vortex Aero roof rack kit from Rhino Rack has a 220 lb weight capacity which is the highest available capacity roof rack we offer for that vehicle.
The Rhino roof rack is great and is very strong. I would recommend this for anyone that needs a strong roof rack. I took my time installing and took about an hour and half.
Just what I was shopping for. I called on the tech support guys and without a doubt they reassured me of a complete fit for my vehicle.
Product arrived quicker than expected , well packaged and setup was easy for this rack.
Like the craftsmanship of this rack system.
I really love the Rhino Rack so far. It took me a little fiddling (and had to reference the install instructions) to get the bottom sealed, which stopped all whistling. Pretty quite overall and feels very sturdy up there. I also like how easily it can be removed/reattached if need be.
They got the job done and haven't had to mess with the since. They are a lil more bulky looking on my Kia Niro but for the price they look good.
Works very nicely on a 2014 BMW X5 with the low profile rails.
Same same.
Careful with the "Rino" p olitic
Maybe it’s just me, they were a bit tricky to install first time but
they seem like a pretty good product
Quality product, fast service, good communication. What more could you ask for. Will definitely use them again in the future.
Installed quickly on my 2021 BMW X3.
Excellent product delivered promptly.

Do you have a question about this Roof Rack?
Info for this part was:
At etrailer.com we provide the best information available about the products we sell. We take the quality of our information seriously so that you can get the right part the first time. Let us know if anything is missing or if you have any questions.


Francis
7/23/2023
No issues. Pretty simple to install and has stayed in place without requiring any adjustment. We took a trip to Florida last summer and trapped a cargo carrier to the top. It was pretty heavy but the Rhino held up great. Even through the auto car wash no issues. Would definitely recommend.